Craving a breakfast that’s both indulgent and gluten free? These are, hands down, the best gluten free waffles you’ll ever make. They achieve that perfect golden-brown crisp on the outside while staying light, tender, and fluffy on the inside. No more dense or gummy waffles! This recipe is incredibly simple, uses everyday ingredients, and is easily adaptable for dairy-free diets. Whether you’re celebrating a weekend brunch or need a quick weekday treat, these waffles will become a staple in your kitchen.
Why You’ll Love This Gluten Free Waffle Recipe
This recipe was developed to solve the most common problems with gluten free waffles: they often turn out dry, crumbly, or too dense. By using a trusted all-purpose gluten free flour blend and a few simple tricks, you get waffles that rival any traditional version. The batter comes together in one bowl, and the waffles cook up beautifully crisp. Plus, they freeze like a dream, making them perfect for meal prep.
Ingredients Breakdown
Let’s talk about the key players in this recipe. The gluten free all-purpose flour blend is the foundation. A blend with xanthan gum is crucial because it mimics the elasticity of gluten, giving the waffles structure and a pleasant chew. Baking powder ensures they rise and become fluffy. The combination of melted butter (or oil) and eggs adds richness and helps create that crispy exterior. A touch of sugar balances the flavors and aids in browning. And don’t skip the vanilla extract—it adds a lovely warmth.
Step-by-Step Instructions for Perfect Waffles
Start by preheating your waffle iron. While it heats, whisk all the dry ingredients together in a large bowl. In a separate bowl, whisk the wet ingredients until smooth. Pour the wet into the dry and stir gently until just combined. A few lumps are perfectly fine. The most important step is to let the batter rest for 5-10 minutes. This allows the gluten free flour to fully hydrate, resulting in a better texture. Grease your waffle iron lightly, pour in the batter (about 1/2 cup per waffle for a standard 7-inch iron), and cook until golden and crisp. Remove and place directly on a cooling rack to maintain that wonderful crunch.
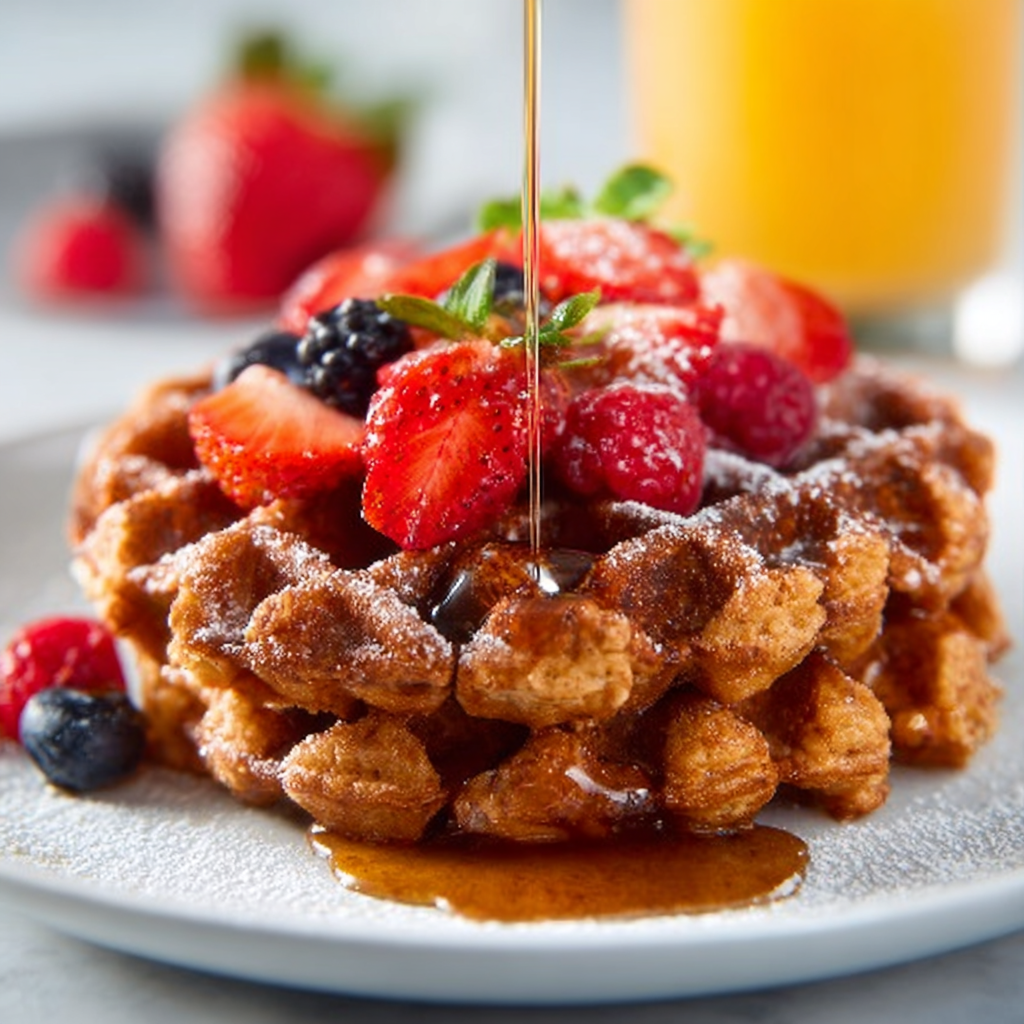
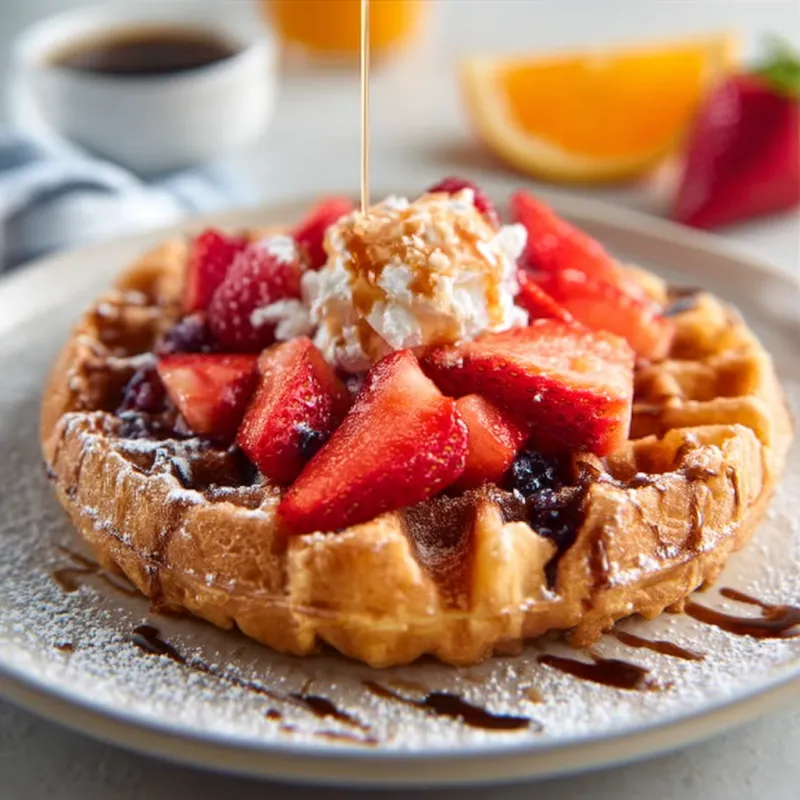
Toppings and Serving Suggestions
These waffles are a blank canvas for your favorite toppings. Classic maple syrup and a pat of butter are always a winner. For a fruity twist, add fresh strawberries, blueberries, or sliced bananas. A dollop of whipped cream or Greek yogurt adds a creamy contrast. For a savory-sweet combination, try crispy bacon and a drizzle of honey. In the fall, a spoonful of apple compote or pumpkin butter is divine.
How to Store and Reheat Leftovers
These waffles are perfect for making ahead. Allow them to cool completely on a wire rack. Store in an airtight container in the refrigerator for up to 3 days. To reheat, simply pop them in a toaster or toaster oven until warmed through and crispy again. For longer storage, freeze the waffles in a single layer on a baking sheet, then transfer to a freezer-safe bag. They will keep for up to 3 months. Reheat directly from frozen in a toaster.
Frequently Asked Questions About Gluten Free Waffles
If you’re new to gluten free baking, you might have a few questions. Don’t worry, we’ve got you covered. The most common question is about the flour blend. As mentioned, a 1-to-1 blend with xanthan gum is best. If your blend doesn’t contain xanthan gum, add 1/2 teaspoon to the dry ingredients. Another common issue is waffles sticking to the iron. Make sure your iron is well-greased and fully preheated. Finally, if your waffles aren’t crispy enough, try reducing the amount of liquid slightly or cooking them a minute longer. Enjoy your perfect gluten free waffles!
Frequently Asked Questions
Can I make these waffles vegan?
Yes, you can make vegan gluten free waffles! Substitute the eggs with flax eggs (1 tablespoon ground flaxseed + 3 tablespoons water per egg), use a plant-based milk like almond or oat milk, and replace the butter with melted coconut oil or vegan butter. The texture will be slightly different but still delicious.
What is the best gluten free flour for waffles?
A high-quality gluten free all-purpose flour blend that already contains xanthan gum works best. Popular brands include King Arthur Measure for Measure, Bob’s Red Mill 1-to-1 Baking Flour, or Cup4Cup. These blends provide the right structure for crispy yet fluffy waffles.
Why are my gluten free waffles not crispy?
Several factors can affect crispiness: ensure your waffle iron is fully preheated, don’t overmix the batter, let the batter rest for 5-10 minutes, and avoid stacking the waffles immediately after cooking—place them on a cooling rack instead. Also, using a bit more oil or butter in the batter can help.
Can I add chocolate chips or blueberries to the batter?
Absolutely! Gently fold in 1/2 cup of mini chocolate chips, fresh blueberries, or chopped nuts into the batter just before cooking. Be careful not to overmix. For blueberries, toss them in a little gluten free flour first to prevent them from sinking to the bottom.
The Best Gluten Free Waffles
Ingredients
Equipment
Method
- Preheat your waffle iron according to manufacturer's instructions.
- In a large bowl, whisk together the gluten free flour, sugar, baking powder, and salt.
- In a separate bowl, whisk together the milk, melted butter (or oil), eggs, and vanilla extract until well combined.
- Pour the wet ingredients into the dry ingredients and stir until just combined. Do not overmix; a few lumps are okay. Let the batter rest for 5 minutes to hydrate the flour.
- Lightly grease the waffle iron with cooking spray or a little melted butter.
- Pour about 1/2 cup of batter onto the center of the waffle iron (or amount recommended by your waffle iron). Close the lid and cook until golden brown and crispy, about 3-5 minutes.
- Carefully remove the waffle and place on a cooling rack to keep crisp. Repeat with remaining batter.
- Serve immediately with your favorite toppings: maple syrup, fresh berries, whipped cream, or butter.